Understanding How Plywood Is Made
Leave a CommentWhat is Plywood?
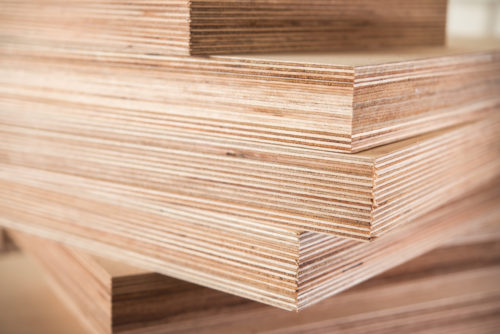
Plywood is a very versatile material that is used throughout a wide range of interior, exterior, and structural applications. It is created by gluing together three or more thin layers of wood veneer using a plywood adhesive, resulting in a flat sheet of wooden material.
How is Plywood Made?
Most people have heard of plywood, but how is it made? The specific process depends on whether you are making hardwood or softwood, but the main steps of the plywood manufacturing process include:
Step One: Selecting the Log
The first step in the plywood manufacturing process involves selecting a log from a tree type that meets the physical and aesthetic requirements of your application.
Step Two: Debarking and Cutting
The logs are loaded into a debarking machine, which removes the bark using sharp-tooth grinding wheels or high-pressure water. The debarked logs are then carried down a conveyor where a large circular saw cuts them into standard-sized sections.
Step Three: Peeling the Logs
Before the veneer can be peeled and cut into sheets, the logs must be soaked and heated to soften the wood. The amount of time it takes depends on the type of wood, the diameter of the log, and other factors. Then, the softened blocks of wood are fed into the peeler lathe.
Step Four: Creating A Ribbon of Wood
The peeler lathe rotates the softened woodblock as a full-length knife blade peels a continuous sheet of veneer from the spinning block. When the diameter of the block shrinks to about 3 or 4 inches, the block is ejected from the lathe. The ribbon of wood that is produced can be immediately processed, wound onto rolls, or stored in long trays.
Step Five: Cutting and Stacking
Processing the ribbon of wood entails cutting it into usable widths. The sections of veneer can then be sorted, stacked, and dried to reduce their moisture content and shrink them before gluing.
Step Six: Gluing
Once the sections of veneer emerge from the dryer, they are ready for gluing. The back veneer is fed through a glue spreader, which applies an even layer of glue. Then, the short sections of core veneer are placed crossways on top of the glue and the whole sheet runs through the glue spreader again. The face veneer can then be placed on top of the glued core. For long-lasting and sustainable results, use Specialty Organics’ BreezeBond™, a formaldehyde-free adhesive, to bind inner core layers and face veneer.
Step Seven: Pressing
After the gluing process, the sheets are then pressed together in a hot press. They are squeezed together under high levels of pressure while being heated to high temperatures. The pressure ensures good contact between layers and the heat works to cure the adhesive for maximum strength.
Step Eight: Trimming and Sanding
The rough sheets are sent through a set of saws, which trim them into their final dimensions. The sanding process can differ depending on the grade of the sheets. For higher grade sheets, both the face and back are sanded, whereas intermediate grade sheets are only spot sanded.
Why Use BreezeBond™ as Your Plywood Glue?
BreezeBond™ offers a wide range of benefits when used for manufacturing plywood. For example, BreezeBond™ is a formaldehyde-free adhesive which features high strength. This makes it suitable for producing plywood while reducing your net carbon footprint and meeting sustainability goals. This low viscosity, hot press adhesive also meets wet or dry strength adhesion standards for a variety of industries.
For more information about our BreezeBond™ adhesive, contact Specialty Organics today. This page goes over the various steps of the plywood manufacturing process and how Specialty Organics’ BreezeBond™ is an ideal plywood adhesive.